安装suse不要选vm host 直接选第一项装,然后完了再去yast2 立马增加虚拟机功能,否则没有图形界面,还要鼓捣图形界面。。。
安 装SUSE的时候,刚开始选择图形界面我选择最小安装,安装完以后就没有KDE界面和GNOME界面。
后来用yast2把这些软件包全部装上,可 是还是原来的界面。
https://susetips.wordpress.com/2010/01/12/how-to-install-gnomekde-desktop-environment-on-opensuse-11/
后来去网上找了好几个小时的资料终于解决了问题。
/etc/sysconfig/displaymanager
里面设置 DISPLAYMANAGER="xdm"
将 xdm 改成 kdm 就可以了。 凑合用,和默认装的还是有点区别
打开vnc suse默认是已经装好vnc server 的只需要配置就可以了,如果没有就 yast2 -i tightvnc,另外,在那个用户登录,就用那个用户配
xauth: (argv):1:  bad display name "dlp:1" in "add" command
New 'dlp:1 (suse)' desktop is dlp:1
Creating default startup script /home/suse/.vnc/xstartup
Starting applications specified in /home/suse/.vnc/xstartup
Log file is /home/suse/.vnc/dlp:1.log
停止vnc 服务 vncserver -kill :1
修改默认启动界面为gnome vi ~/.vnc/xstartup
注释掉最后两行如下
#twm &
# start with diplay number '1', screen resolution '800x600', color depth '24'
添加
exec gnome-session &
启动vnc server: vncserver :1 -geometry 1024x730 -depth 24
可以设置分辨率,我是1366x768的 因此高度可以设多一点
http://www.server-world.info/en/note?os=SUSE_Linux_Enterprise_Server_11&p=x&f=2
http://www.server-world.info/en/note?os=SUSE_Linux_Enterprise_Server_11&p=x&f=2
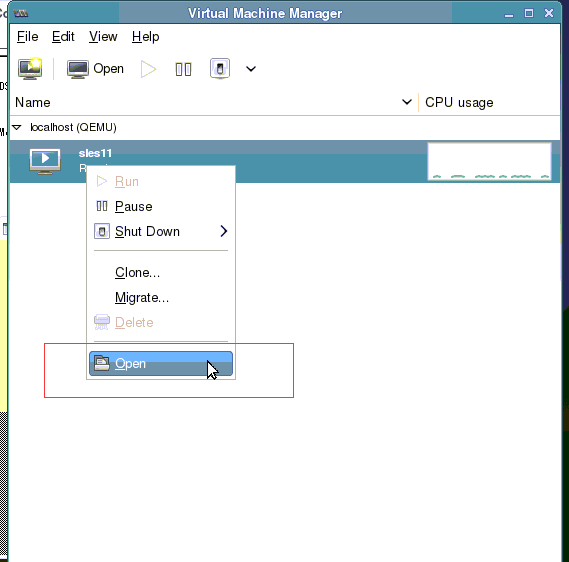
虚拟机安装,直接用suse自带工具就可以,唯一疑问的就是安装源部分,其实只要吧iso拷贝到宿主机本地,然后选第一项virtual disk,点右面加号,在点browser,找到哪个iso文件选中就ok了。完全不用搞什么虚拟盘和网络安装。大体步骤可以看下面的有截图
http://support.huawei.com/enterprise/docinforeader.action?contentId=KB1000007039
新建虚拟机时选不了网卡模式,建好以后再选,如果选不了没关系,把网卡闪了,点add新增一个网卡就ok了。看好要桥接到的网卡,
source device: host device eth0 : macvtap
device model: virtio
source mode : bridge
立马就通了。。。。。。。。

下面是鼓捣wlan桥接的记录(最后也没有成功),如果是有线完全可以不管。
suse 切换ifup和networkmanager配置网络,就是在 yast的. 选择,见下文
https://www.suse.com/documentation/sled11/book_sle_admin/data/sec_nm_activate.html
本来看论坛说networkmanager可以直接配网桥,结果因为sles 11 sp3 自带的版本才0.7 不支持,擦。白弄
桥接到wlan
brctl addif mybridge wlan0 在这一步时报错,无法添加

http://serverfault.com/questions/152363/bridging-wlan0-to-eth0


google看要使用iw工具设置 4addr
安装iw 工具
老版本没有这个工具 sles 12才有
iw dev <wifiInterface> set 4addr on再 brctl addif mybridge wlan0 成功,但wlan0网卡立马挂掉了,连不上了
google这两篇文章
http://askubuntu.com/questions/155041/bridging-loosing-wlan-network-connection-with-4addr-on-option-why 最后一个回复和
http://nullroute.eu.org/~grawity/journal-2011.html#post:20110826
大意是说4addr 要使用带WDS也就是ap桥接功能的无线路由,然后通过网卡来桥接到路由的方法来实现
VirtualBox bridged network and WLAN §
Bridging wlan0 is a pain. You normally cannot add it to a bridge interface (brctl returns "Operation not permitted"), and using VirtualBox "bridged" filter results in a big mess of ARP and DHCP conflicts. The cause of this is that 802.11 frames contain only three addresses by default: the MAC addresses of both wireless devices (laptop and AP) and of the final recipient (as in Ethernet). It is always assumed that there is only one possible originator.
802.11 can carry the fourth, originator's MAC address, and this is used in WDS mode by repeaters. This feature can be enabled on Linux too, using iw, and enabling this mode will allowwlan0 to be used in bridge interfaces, as well as with VirtualBox bridged networking:
iw dev wlan0 set 4addr on
However, with 4addr enabled, you're likely to get completely ignored by the AP: association succeeds but all data frames disappear into the ether. This could be for security reasons (because it's damn hard to spoof the source MAC address. Yeah.) In my router (running OpenRG), it's necessary to enable "WDS" mode for the wireless AP interface, add a WDS device restricted to my laptop's MAC address, and add it to the LAN bridge. 4addr packets now work.
There's another problem with this, though – the router now rejects three-address packets from the laptop, which can be rather inconvenient (having to toggle 4addr every time the WLAN network is changed). The workaround is to add, on the laptop, a second wireless interface linked to the same device, but with a different MAC address. First undo the earlier configuration:
iw dev wlan0 set 4addr off
Then, add a second interface – the name was chosen arbitrarily – with a different MAC address:
iw dev wlan0 interface add wds.wlan0 type managed 4addr on
ip link set dev wds.wlan0 addr <addr>
ip link set dev wds.wlan0 up
Here <addr> must match the WDS device address configured in the router; other than that, it can be any valid MAC address. The original MAC of wlan0 then remains for "normal" usage.
It's possible to use both wlan0 and wds.wlan0 at the same time – although I've only tested associating to the same AP twice, not to different APs. I'm guessing they would need to at least be on the same channel.
(Update: Some people have asked me why I wrote this when VirtualBox can bridge WiFi "just fine". The answer is that VirtualBox does not send the virtual machines' MAC addresses; rather, it performs NAT at the MAC layer too. – 2014-08-22)
我照着敲,但在 ip link set dev wds.wlan0 up
RTNETLINK answers: Operation not supported
网上有文章说是iproute2 的内核选项没开导致的,但我觉着我的不是,我的是因为网卡不支持 ap模式的原因
iw查看网卡支持的功能
Supported interface modes:
* managed
* monitor
software interface modes (can always be added):
* monitor
目前这个可以用的rtl8187的卡,不支持硬件和软件路由,但唯一可以用的就是这个。。。。。试了各种都认不出。估计是sles 11 sp3 这个版本的linux 内核太老了 3.0的 2011年的。。。详细核心支持的网卡列表可以到 这里 找 有详细的列表和内核版本
ifconfig br0 down
安装 traceroute
sudo apt-get update
sudo apt-get install traceroute
LoadError: No such file to load -- rufus/scheduler
C:\Bitnami\redmine-3.2.0-1\apps\redmine\htdocs\plugins> gem install rufus-scheduler
修改htdocs目录下的Gemfile 添加
gem "rufus-scheduler"
删除 Gemfile.lock
重新运行
C:\Bitnami\redmine-3.2.0-1\apps\redmine\htdocs\plugins>bundle install --without development test --binstubs --no-deployment
Unicode gem is not available
C:/Bitnami/redmine-3.2.0-1/apps/redmine/htdocs/plugins/easyproject/easy_plugins/easy_extensions/lib/easy_patc/core/string.rb:19:in `compare'
gem install unicode
gem install unf
NameError: uninitialized constant OmniAuth
C:/Bitnami/redmine-3.2.0-1/apps/redmine/htdocs/plugins/easyproject/easy_plugins/easy_basecamp_import/after_init.rb:18:in `<top (required)>'
© 2016, 新之助meow. 原创文章转载请注明: 转载自http://www.xinmeow.com